
Ciabatta bread is a relatively modern Italian bread that was created in the early 1980s by a baker named Arnaldo Cavallari in the Veneto region. Its invention was a response to the popularity of French baguettes and aimed to provide Italians with a similarly light, airy bread suitable for sandwiches. The name “ciabatta,” which means “slipper” in Italian, refers to the bread’s flat, elongated shape resembling a slipper. Made with a wet, high-hydration dough, ciabatta is characterized by its crisp crust and open, porous crumb. Since its creation, ciabatta has become popular not only throughout Italy but worldwide, celebrated for its versatility and rustic texture that pairs well with a variety of savory fillings.
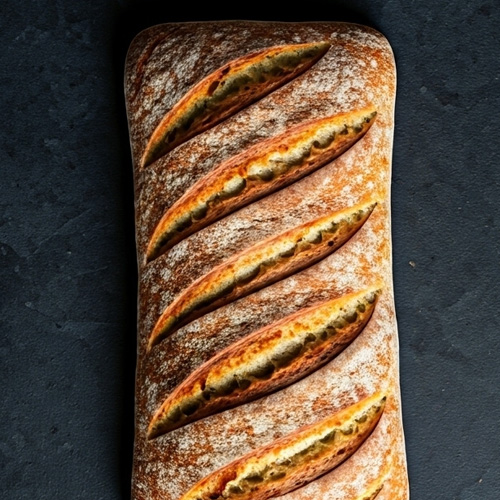
Ciabatta, a rustic Italian bread, is crafted from a blend of wheat flour, water, olive oil, salt, and yeast. It possesses a crusty, golden-brown exterior and a chewy interior characterized by airy, sizable holes.
Ingredients
Method
Sponge
- Combine the flour, water, and yeast in a medium bowl. Stir using a wooden spoon until the mixture is thoroughly blended and reaches a smooth consistency. Cover the bowl with plastic wrap and allow it to ferment at room temperature for a minimum of 12 hours, extending up to 20 hours.
Dough
- Introduce the sponge and all the dough ingredients into the bowl of a stand mixer, equipped with the paddle attachment. Operate the mixer on low speed to ensure all the flour becomes moistened, which typically takes around 2-3 minutes. Then, elevate the speed to medium-low and continue mixing until the dough coalesces into a cohesive mass, detaching from the sides of the bowl.
- Transition to the dough hook attachment and adjust the mixer to medium-low speed. Allow the mixer to run until the dough transforms into a smooth and glossy texture, around 10 -12 minutes. The resulting dough should be soft, moist, and sticky, akin to a batter-like consistency.
- Gently apply a thin layer of olive oil to the interior of a spacious bowl. Employ a spatula to transfer the dough into the bowl. Cover the bowl with plastic wrap and allow the dough to rise for a duration of 1 hour at room temperature.
- Using a spatula or damp hand, delicately grasp one side of the dough and lift it, then gently stretch it over the top of the dough itself. Rotate the bowl by 180 degrees and repeat the stretching process. Turn the bowl by 90 degrees, perform another stretch and fold action. Finally, turn the bowl by 180 degrees once again to complete the stretch and fold on the last side. Flip the dough so that the previously bottom side now faces upwards. Cover the dough with plastic wrap and allow it to rest at room temperature for a duration of 45 minutes.Repeat the folding process two more times, each time covering the dough with plastic wrap and letting it rest for an additional 45 minutes afterward.
- Preheat the oven to 450°F (232°C). It's crucial to allow the oven to preheat for a minimum of 30 minutes to ensure it reaches the required high temperature.
- Arrange the oven racks, ensuring one is positioned in the lower-third part and the other at the absolute bottom position. Set a cast-iron skillet on the lowest rack.
- Sprinkle some flour over your work surface and carefully release the dough from the bowl onto it. Exercise gentleness in this step to avoid deflating the dough and aim to minimize handling. Generously sprinkle flour over the top of the dough. Utilizing two bench scrapers that have been floured, gently shape the dough from its sides, coaxing it into a square form. Take care to avoid applying pressure on the top surface of the dough.
- Divide the dough in half by slicing down the middle of the square. With the help of the bench scrapers, gently mold each half into loaf shapes by working with the sides.Turn over a sizable baking sheet and position a sheet of parchment paper over it. Dust the parchment paper generously with flour. Utilizing both bench scrapers, slip them beneath both ends of the dough and relocate the dough to the parchment paper you've prepared. Repeat this process with the remaining loaf. While shaping the dough into rectangles, use your fingertips to gently press the surface of each loaf.
- Place a cloth over the loaves and allow them to proof in a location free from drafts. This should continue until they become puffy and the surface exhibits small bubbles, which usually takes around 30 minutes.Keep a cup filled with 1 cup of ice prepared. Mist the loaves with water and then gently glide the baking sheet into the oven. Swiftly place the ice into the cast-iron pan positioned on the lower rack. Promptly shut the oven door.
- Bake the loaves until the crust achieves a deep golden-brown hue, which typically takes around 25 to 30 minutes. Once done, transfer the loaves to a cooling rack and allow them to cool completely before serving.


