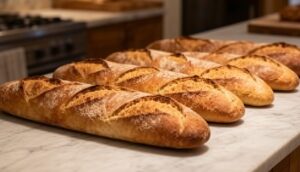
Fresh Italian Filone Bread
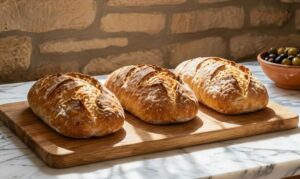
Unlike the sleek, refined baguette born in 19th-century Paris, the Italian Filone bread has humbler, older roots stretching deep into the rural heartlands of central and northern Italy. In regions like Tuscany, where bread is as essential as olive oil and wine, loaves were traditionally baked to endure—dense, crusty, and built to last through days of meals. Traditional rustic Italian Filone bread from Tuscany with dense, crusty loaves rooted in rural heritage
Long before modern bakeries, Italian families in the countryside would bake these elongated loaves in wood-fired ovens, sometimes only once a week. The shape made them easy to slice, the thick crust kept them from going stale too quickly, and the flavor deepened with time, perfect for dipping into brothy soups or soaking up a rich tomato sauce.
Over generations, this practical farmhouse bread evolved into what we now know as Filone: a lean, rustic loaf with a chewy crumb and golden crust. While its core identity remained, each region shaped it slightly to suit local tastes some added olive oil, others dusted it with semolina, and in every case, it remained the go-to bread for everyday meals, from bruschetta at breakfast to panini at lunch.
Italian Filone bread
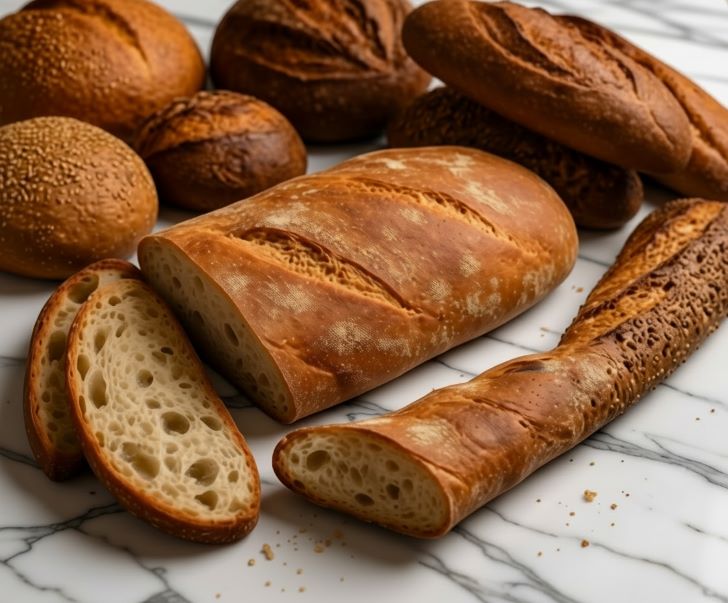
The name Filone comes from the Italian word “filo,” meaning “thread” or “line,” a nod to the bread’s elongated, streamlined shape. At first glance, it may remind you of the French baguette but make no mistake, Filone is no imitation. This distinctly Italian loaf boasts a heartier crumb and a rustic crust often dusted with flour or semolina, giving it an artisanal, countryside character.
Traditionally crafted from a lean dough, just flour, water, salt, and yeast. Filone is simplicity at its best. In some regions, bakers enrich the dough with a touch of olive oil, adding a delicate softness and flavor that reflects the Mediterranean pantry. The result is a versatile, everyday bread with a chewy interior and a golden, crackling crust.
In a country where food is both tradition and art, Filone holds a special place among Italy’s many regional breads. Whether served with olive oil, used for panini, or paired with soups and cured meats, it captures the soul of Italian baking, rustic, honest, and deeply rooted in centuries of culinary heritage.
A Taste of Italy in Your Kitchen
If you’re a home baker looking for your next project, Filone is the perfect blend of simplicity and charm. All you need is flour, water, salt, and yeast, though if you want to take it a step further, a splash of olive oil or a pre-ferment like biga can add depth and complexity. The dough is typically lean, meaning there’s no fat or sugar, which makes the crust beautifully crisp and the crumb delightfully chewy.
The process doesn’t require fancy techniques, but it does reward a bit of patience. Many bakers prefer to let the dough rest overnight, allowing the flavors to fully develop and the gluten to relax. The result? A golden, flour-dusted loaf with a hearty crust perfect for dipping into olive oil, piling with fresh tomatoes and basil, or simply tearing apart while it’s still warm.
Bringing Filone into your home baking routine isn’t just about making bread, it’s about experiencing a slice of Italian culture, shaped by generations and passed down through rustic kitchens and communal ovens.
Filone and a Baguette would be a hybrid loaf that combines the elegant lightness and shape of a French baguette with the rustic texture and hearty character of an Italian Filone.
Typical ingredients for Filone
Bread flour (or all-purpose flour)
Water
Yeast (active dry, instant, or fresh)
Salt
Olive oil (optional)
Sugar (optional)
Classic Filone is very simple, flour, water, yeast, and salt similar to French baguette dough, but often shaped slightly thicker and sometimes enriched with a touch of olive oil.
Ingredients
Equipment
Instructions
- Activate Yeast (if using active dry yeast): In a small bowl, combine yeast with a few tablespoons of lukewarm water and a pinch of sugar. Let it sit for 5–10 minutes until foamy.(Skip this step if using instant yeast — just mix it in with the flour.)
- Make the Dough: In a large mixing bowl (or stand mixer), combine flour and salt. Add the activated yeast (or instant yeast), water, and olive oil. Mix until a sticky dough forms.Note: The dough should be soft and slightly tacky but not too wet.
- Knead the Dough: Knead for 10 minutes by hand or 6–8 minutes with a dough hook on medium speed until the dough is smooth and elastic.
- First Rise (Bulk Fermentation): Place dough in a lightly oiled bowl, cover with a damp towel or plastic wrap. Let it rise at room temperature for 2 hours, or until doubled in size.
- Shape the Loaves: Gently turn dough onto a floured surface. Divide it into 2 equal portions. Shape each into a rough oval or oblong loaf (filone means "thread" or "line").Be careful not to deflate the dough too much.
- Second Rise: Place loaves on a parchment-lined baking tray or in a floured proofing cloth. Cover with a towel and let rise for 1.5 to 2 hours, until puffy.
- Preheat Oven: Preheat oven to 220°C / 430°F.Place a baking stone or an inverted baking sheet inside.Optional: Place a tray of hot water at the bottom of the oven for steam (for a better crust).
- Score and Bake: Dust the tops with a bit of flour or semolina.Slash each loaf with a sharp knife or razor blade (one long cut down the middle or a few diagonal slashes).Slide onto the hot stone/tray and bake for 25–30 minutes until golden brown and hollow-sounding when tapped.
- Cool: Let cool on a wire rack for at least 30 minutes before slicing.
Notes
Nutrition Estimated Facts – Filone (Italian Baguette)
(Serving size: (1 slice ≈30–32 g)
| Nutrient | Amount | %DV* |
|---|---|---|
| Calories | 80 | — |
| Total Fat | 1 g | 1% |
| Saturated Fat | 0 g | 0% |
| Cholesterol | 0 mg | 0% |
| Sodium | 180 mg | 8% |
| Total Carbohydrate | 15 g | 5% |
| Dietary Fiber | 1 g | 4% |
| Total Sugars | 1 g | — |
| Added Sugars | 0 g | 0% |
| Protein | 3 g | 6% |
| Calcium | 30 mg | 2% |
| Iron | 0.9 mg | 5% |
| Potassium | 30 mg | 1% |
Most calories in filone come from refined wheat carbohydrates. Fat content is very low unless the recipe includes added olive oil, butter, or cheese.
Tried this recipe?
Let us know how it was!Storage
Short-term (1–2 days):
Store the bread at room temperature in a paper bag or wrapped loosely in a clean kitchen towel. This helps maintain the crust’s crispness while keeping the inside soft.
Avoid plastic bags for fresh bread as they trap moisture and soften the crust.
Medium-term (up to 1 week):
Slice the bread and store it in an airtight container or plastic bag in the refrigerator to slow mold growth, but note this may slightly dry out the bread.
Long-term (up to 3 months):
Wrap the whole loaf or individual slices tightly in plastic wrap or aluminum foil, then place them in a freezer-safe bag. Freeze for later use.
To refresh frozen bread:
Thaw at room temperature, then warm it in a 180°C (350°F) oven for 5–10 minutes to restore crust crispness.