Pizzelle Cookies: A Taste of Italian Tradition
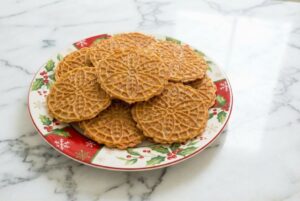
Pizzelle cookies aren’t they just delightful? These light; crunchy treats have been a beloved part of Italian cooking for ages. What really sets them apart is that unique lace pattern, all thanks to the special iron mold used to whip them up. Honestly, that intricate design gives pizzelle a charm that makes them stand out from your typical cookie.
Pizzelle originate from central Italy, particularly in the regions of Abruzzo and Molise. The exact timeline of when they first appeared is a bit fuzzy, but many historians think they go all the way back to the 8th century, even to ancient Roman times! Some folks even believe they were inspired by Roman honey cakes, which were baked in similar molds and spiced up with flavors like anise. Isn’t that fascinating?
Even though pizzelle have such deep roots, they didn’t really gain popularity until the 18th century. The name “pizzelle” actually comes from the Italian word “pizzo,” which means “spike” or “point.” How fitting is that for their lovely lacey design? These cookies were initially reserved for special occasions like Christmas and Easter, but now? You’ll find them at almost every holiday or family gathering.
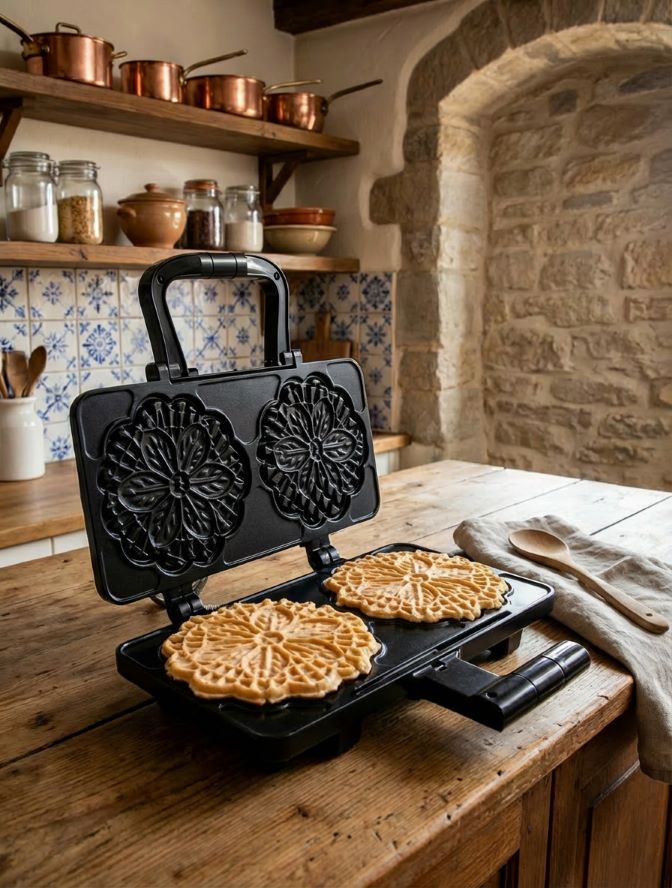
You Absolutely Need a Pizzelle Iron for Perfect Cookies
If you’re looking to make authentic pizzelle at home, a pizzelle iron is a game-changer. Think of it like a waffle maker, but for those delicate, crispy Italian cookies. This handy tool uses two hot, patterned plates to flatten the dough while creating those beautiful, signature designs—whether it’s a snowflake, flower, or lace pattern. Not only does it ensure your pizzelle turn out perfectly crispy, but it also gives them that extra touch of charm. If you want to take your pizzelle-making to the next level, a pizzelle iron is definitely worth adding to your kitchen!
Typical Ingredients for Pizzelle Cookies
All-purpose flour
Eggs
Granulated sugar
Unsalted butter or vegetable oil
Anise extract or anise seeds (traditional)
Baking powder
Salt
Common Variations
Vanilla extract (instead of or in addition to anise)
Lemon or orange zest
Almond extract
Cocoa powder (for chocolate pizzelle)
These ingredients create the classic thin, crisp Italian waffle-style cookie traditionally made with a pizzelle iron.
Ingredients
Equipment
Instructions
- Prep Your Pizzelle Maker:Preheat the pizzelle iron according to the manufacturer’s instructions. Lightly grease with cooking spray or a little melted butter to prevent sticking.
- Make the Batter:In a large mixing bowl, whisk the eggs and granulated sugar until light and fluffy.Add the melted butter and anise extract. Mix until combined.In a separate bowl, sift together the flour, baking powder, and salt.Gradually add the dry ingredients to the wet ingredients, stirring gently until a smooth batter forms.
- Cook the Pizzelle:Drop a tablespoon of batter onto the center of each pizzelle iron grid (amount depends on your specific iron).Close the lid and cook for 30-60 seconds, or until golden brown (time varies based on your pizzelle iron).Carefully remove the cookies with a fork or a spatula. Be cautious as they will be hot!
- Cool & Serve:Place the pizzelles on a wire rack to cool completely.Optional: Dust with powdered sugar before serving for an extra touch of sweetness.
Notes
Pizzelle Iron: Grease the Iron: Even if you have a non-stick iron, lightly greasing it with butter or cooking spray between batches helps prevent sticking and ensures even browning. Temperature: The temperature of the iron matters. If it’s too hot, the pizzelles will burn. If it’s not hot enough, they might turn out chewy. Adjust based on your specific iron and test with the first few.
Tried this recipe?
Let us know how it was!To make Chocolate Pizzelles, simply add the following ingredients to your batter:
¼ cup cocoa powder
¼ cup additional granulated sugar
¼ teaspoon additional baking powder
These will give your pizzelles a rich chocolate flavor and enhance their texture!
Crispy Pizzelles:
When you cook your pizzelles, leave them on the iron for an additional 10–20 seconds beyond the normal cooking time, depending on how crispy you like them. Keep an eye on the color; once they’re golden brown, they should be nice and crispy.
Thin Layer of Batter:
Make sure to spread a thin, even layer of batter onto the pizzelle iron. The less batter, the crispier the cookies. Too much batter will result in thicker, softer cookies.
High Heat:
Make sure your pizzelle iron is preheated to the right temperature. If it’s too low, they’ll come out softer. A hotter iron creates that crisp, delicate texture.
Softer Pizzelles: If you prefer softer pizzelles, cook them for a slightly shorter time (around 30 seconds) and remove them while still light golden.
Flavor Variations
Anise: Traditional pizzelles often use anise extract for a distinctive flavor. If you don’t have it, you can replace it with vanilla or almond extract for a different twist.
Citrus Zest: A tablespoon of lemon or orange zest added to the batter gives a fresh, bright flavor. It pairs well with vanilla or almond extract.
Spices: Ground cinnamon, nutmeg, or even a little clove can be added for a spiced variation, especially around the holidays.
Decorating
After cooling, you can dip the edges in melted chocolate or drizzle chocolate over the top for a decorative touch. Adding sprinkles or colored sugar can make them festive, especially for holidays
Storage
Pizzelles are best stored in an airtight container at room temperature. They can stay fresh for about 1-2 weeks, but their crispiness will start to fade after a few days.
Freezing: To store them longer, freeze them. Layer the pizzelles with wax paper in a freezer-safe container, and they can last up to 3 months in the freezer. Let them cool completely before freezing to prevent moisture build-up.