
Tarallucci al Limone Recipe (Easy Italian Lemon Knot Cookies)
Tarallucci al Limone never try to impress. Instead, they reflect everyday Italian baking. Home cooks made them in family kitchens, not pastry shops. Their story begins in southern and central Italy, where taralli first appeared as simple bread rings. Bakers shaped them by hand, kept them savory, and baked them to last.
Over time, things changed. Home bakers softened the dough. They added eggs, sugar and oil. Soon, the texture turned tender. The shape became knotted. These sweet tarallucci fit perfectly alongside coffee or a glass of milk.
Then came lemon. In regions like Campania, Sicily, and the Amalfi Coast, citrus grows everywhere. As a result, lemon zest became a natural choice. It added aroma without heaviness. Tarallucci al Limone never aimed to be rich or sugary. Instead, they stay light. Slightly crisp outside. Soft inside. Fresh lemon scent in every bite.
People baked these cookies for simple moments. An afternoon snack. A quick breakfast. A small treat for guests. The knot shape mattered, too. It showed care and tradition. Bakers formed each cookie by hand. No molds. No machines. Just dough, rolled and tied with ease.
Today, Tarallucci al Limone remain a quiet classic. Italians still link them to home. They prove a simple truth, the best Italian cookies rely on simplicity. These lemon knot cookies bring a taste of Italian tradition to the holidays. celebrations.
Typical Ingredients for Italian Lemon Knot Cookies

All-purpose flour
Granulated sugar
Eggs
Butter unsalted or Vegetable oil
Fresh lemon zest
Fresh lemon juice
Baking powder
Salt
Vanilla extract (optional, but common)
Lemon glaze:
Powdered (confectioners’) sugar
Fresh lemon juice
Lemon zest (optional, for extra flavor)
Vanilla extract (optional)
Two Italian Christmas Cookies, One Holiday Table
If you love these Italian lemon knot cookies, you’ll also enjoy my Authentic Anise Cookies).
Classic Anise Cookies are soft and sweet with a bold licorice flavor and festive glaze. Lemon Knot Cookies are lighter, gently crisp, and bright with fresh lemon. One tastes traditional and bold. The other feels simple, fresh, and easy to love.
Ingredients
Equipment
Instructions
- DoughIn a large bowl, cream together butter and sugar until light and fluffy (2–3 minutes).Add eggs one at a time, mixing well after each addition.Mix in lemon zest, lemon juice, and vanilla.In a separate bowl, whisk flour, baking powder, and salt.Gradually add dry ingredients to wet mixture until a soft dough forms.
- ChillCover dough and refrigerate for 30 minutes (helps with shaping).
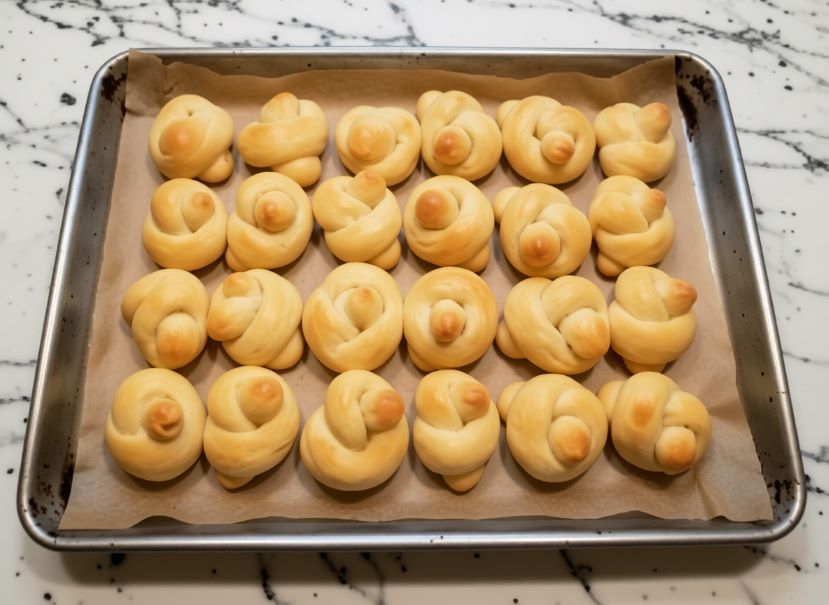
- ShapePreheat oven to 350°F (175°C). Line baking sheets with parchment.Scoop about 1 tablespoon of dough and roll into a 6-inch rope.Form into a loose knot and place on baking sheet, spaced 2 inches apart.
- BakeBake for 15–18 minutes until bottoms are lightly golden but tops remain pale.Cool on pan 5 minutes, then transfer to wire rack.
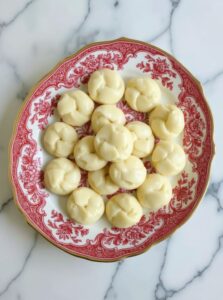
- GlazeWhisk powdered sugar and lemon juice until smooth and slightly thick.Dip tops of cooled cookies into glaze.Place back on rack and allow glaze to set (about 20 minutes).
Notes
Nutrition Estimated Facts
Taralli al Limone (Italian Lemon Knot Cookies)
Taralli al Limone Serving Size: 1 cookie (1 of 36)
| Nutrient | Amount | %DV |
|---|---|---|
| Calories | 115 | — |
| Total Fat | 3.5g | 4% |
| └ Saturated Fat | 2g | 10% |
| Cholesterol | 22mg | 7% |
| Sodium | 45mg | 2% |
| Total Carbohydrate | 19g | 7% |
| └ Dietary Fiber | 0g | 0% |
| └ Total Sugars | 10g | — |
| └ Added Sugars | 9g | 18% |
| Protein | 2g | 4% |
Tried this recipe?
Let us know how it was!Classic Anise Cookies vs. Lemon Knot Cookies
Difference in the Recipe
At their core, these two cookies start from almost the same dough, but the flavoring takes them in completely different directions. Classic Anise Cookies use anise extract or seeds, giving the dough that deep, old-fashioned licorice aroma, and they’re usually finished with a simple white glaze and sprinkles. Lemon Knot Cookies, instead, get their personality from fresh lemon zest and juice, which slightly softens the dough and keeps the flavor light and bright. The glaze follows suit, lemony, thinner, and tangy proof that one small ingredient change can turn the same base recipe into a totally different holiday cookie.
In many Italian families, anise cookies are for the adults, while lemon knot cookies are for everyone. That’s why you often see both on the same holiday tray they balance each other perfectly.
Choose anise cookies when you want that classic, old-school Italian flavor that tastes like tradition and Christmas past. Go with lemon knot cookies if you’re craving something bright, gentle, and easy for everyone to love. And if you want a truly authentic Italian Christmas spread, don’t choose at all. These two cookies don’t compete. They balance each other. And in many Italian homes, Christmas wouldn’t feel complete without both.
Serving
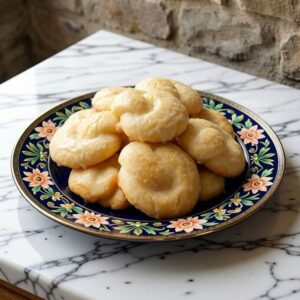
Serve Tarallucci al Limone slightly cooled or at room temperature for the best flavor and texture. Arrange them on a festive plate for holiday gatherings, alongside coffee or tea for an afternoon treat, or in a small basket as a charming gift. Their bright lemon aroma and tender, slightly crisp texture make them a delightful addition to any dessert spread. For extra flair, drizzle with a light lemon glaze or dust with powdered sugar just before serving.
Holiday Dessert Platter:
Arrange them alongside anise cookies, biscotti, pizzelle, and chocolate truffles for a festive Italian-inspired holiday dessert tray.
These cookies are perfect for casual snacking, special occasions, or holiday celebrations, simple, cheerful, and authentically Italian.
Storage

Room Temperature:
Store cooled Tarallucci al Limone in an airtight container at room temperature for up to 5 days. Keep them away from heat or direct sunlight to maintain their texture and flavor.
Freezing:
Place them in a single layer on a baking sheet to freeze for about 1 hour.
Transfer to an airtight container or freezer bag, separating layers with parchment paper. They can be stored in the freezer for up to 2 months.
Thaw at room temperature before serving; they taste almost as fresh as the day they were baked. If you’ve glazed or dusted them, freeze them without the glaze, then add it after thawing for best results.


")

