Italian Rainbow Cookies: A Colorful Italian American Classic
So, let’s talk about Italian rainbow cookies—sometimes called tricolor or seven-layer cookies. At first glance, you might think they’re straight out of Italy, right? But hold on! They actually trace their origins back to Italian-American communities in the early 1900s. Yep, these delightful treats were brought to life by Italian immigrants right here in the U.S.
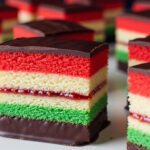
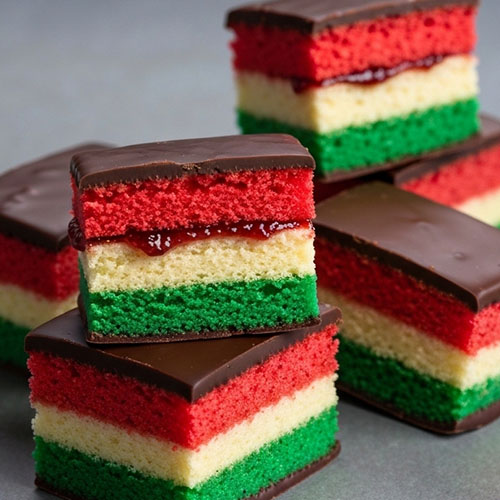
Now, what’s the deal with their colorful layers? Well, they were designed to reflect the Italian flag. Picture the vibrant layers of almond-flavored sponge cake in green, white, and red. And to keep those layers together, there’s usually a touch of raspberry or apricot jam in between. Oh, and don’t forget the smooth layer of dark chocolate on top!
These cookies draw inspiration from traditional Italian almond pastries and marzipan desserts, making them a sweet way for immigrants to honor their roots. Fast forward to today, and you’ll still find them as a beloved staple in Italian-American bakeries. They’re famous not just for their striking colors, but also for that nostalgic charm and, of course, the rich, layered flavor that keeps folks coming back for more.
Cake Layers
- 1 cup (2 sticks) unsalted butter, softened
- 1 cup granulated sugar
- 4 large eggs, separated
- 1 (8-ounce) can almond paste (not marzipan)
- ¼ teaspoon salt
- 1 teaspoon almond extract
- 1 ¼ cups all-purpose flour
- Red and green gel food coloring (not liquid)
Filling & Topping
- ⅓ cup raspberry jam (seedless preferred)
- ⅓ cup apricot jam (or use just one flavor)
- 1 ½ cups semi-sweet chocolate chips or chopped dark chocolate
- 1 tablespoon unsalted butter (optional, for melting chocolate)
Prepare the Oven & PansPreheat oven to 350°F (175°C). Line 3 rimmed 9×13-inch pans with parchment paper, leaving overhang for easy removal. If using one pan, bake layers one at a time. Make the BatterIn a large bowl, cream butter and sugar until light and fluffy (3–5 minutes).Add egg yolks, one at a time, beating well after each.Crumble in almond paste and beat until smooth.Mix in almond extract and salt.Gradually beat in flour until fully incorporated. Whip Egg WhitesIn a separate bowl, beat egg whites to stiff peaks. Gently fold into the batter until fully combined (this keeps the layers light). Divide & Color the BatterDivide batter evenly into 3 bowls.Leave one bowl uncolored (white). Tint one bowl red, and the other green, using gel food coloring. Mix until evenly colored. Bake the LayersSpread each colored batter into a prepared 9×13-inch pan.Bake each layer at 350°F for 10–12 minutes, or until just set (do not overbake).Let cool completely on wire racks. Assemble the LayersPlace green layer on a piece of parchment.Spread with half of the raspberry or apricot jam.Top with white layer. Spread with remaining jam.Add red layer on top. Compress and ChillWrap the layered cake tightly in plastic wrap.Place a cutting board or baking sheet on top to compress. Weigh it down with cans or books.Chill for at least 4 hours or overnight to set layers. Coat with ChocolateMelt chocolate (and butter if using) in a microwave-safe bowl in 30-second bursts. Stir until smooth.Unwrap the chilled cake and spread melted chocolate evenly on top using an offset spatula.Let set slightly (about 15 minutes in fridge), then flip over and coat the other side. Trim & SliceOnce chocolate is fully set, trim edges for clean sides.Slice into 1-inch by 1.5-inch rectangles using a sharp serrated knife. You should get around 48 cookies.
Use Almond Paste, Not Marzipan: Almond paste is less sweet and more pliable than marzipan. It gives the cookies their classic nutty flavor and texture. Look for it in the baking aisle or online—brands like Odense are reliable.
Gel Food Coloring: Vibrant Layers Gel food coloring works best because it provides intense color without thinning the batter. Liquid food dye can water down the mix and create duller tones.
Don’t Skip the Chilling: Compressing and chilling the cookie layers is key to getting clean, even slices and helping the flavors meld. For best results, chill overnight with a heavy object (like a cutting board with canned goods) on top.
Chocolate Coating Tips: Let the chocolate firm up slightly before flipping and coating the other side—about 10–15 minutes in the fridge is perfect. If it sets too hard, it may crack when you flip.
Optional: add a tablespoon of butter or shortening to the chocolate for a smoother, shinier finish.
Clean Cuts: Use a sharp serrated knife. Wipe the blade clean between cuts.
Slightly warm the knife under hot water and dry it off—this helps avoid cracks in the chocolate.
Storage
Refrigerator
Store rainbow cookies in an airtight container in the refrigerator for up to 1 week. Layer cookies between parchment or wax paper to prevent sticking and smudging the chocolate coating.
Let them sit at room temperature for about 10–15 minutes before serving for the best texture and flavor.
Freeze
Cookies freeze beautifully and are a great make-ahead option.
After the chocolate is fully set, slice the cookies and place them in a single layer on a baking sheet. Freeze until solid (about 1 hour), then transfer to a freezer-safe container or zip-top bag, layering with parchment between rows. Freeze for up to 1 month.
Thaw
Remove the desired amount and thaw overnight in the fridge or let sit at room temperature for about 30 minutes before serving.
Freezing the cookies actually enhances their flavor as the layers meld over time—some bakers even prefer them after a freeze!
Like this:
Like Loading...
