Italian butter cookies, often known as biscotti al burro or Italian butter spritz cookies, trace their roots to Northern Italy, especially regions like Veneto and Lombardy, where butter has long been a star ingredient in home kitchens and bakeries alike. In these areas, rich dairy wasn’t a luxury; it was part of everyday life.
Inspired by European shortbread, Italian bakers put their own spin on the idea. They created cookies that were lighter, more delicate, and shaped with care, piped into graceful swirls, rosettes, or flowers. The result was a cookie that looked elegant but felt comforting, with a rich flavor and a texture that practically melts as you take a bite.
If you’ve ever enjoyed a good European shortbread, you’ll instantly recognize the appeal. Italian butter cookies share that tender, crumbly softness and deep buttery flavor. What’s truly amazing is how much flavor comes from such a short list of ingredients: butter, sugar, eggs, and flour. Nothing fancy just done really well.
Of course, bakers couldn’t resist having a little fun with them. Over time, these cookies became a canvas for creativity. Some are dipped in chocolate, others filled with jam, topped with sprinkles, or shaped into elaborate designs. There’s no single moment that defines their beginning, but they’ve earned their place as a beloved bakery staple, especially during holidays and family celebrations.
What I love most about Italian butter cookies is their simplicity. They’re a quiet reminder of how Italian baking turns everyday ingredients into something memorable, no frills, no shortcuts, just pure comfort in cookie form.
Typical Ingredients
Unsalted butter (softened) – the main flavor and texture
Granulated sugar (or powdered sugar, depending on the recipe)
Eggs (usually whole eggs or egg yolks only)
All-purpose flour
Vanilla extract (sometimes almond extract)
whole milk
Baking powder
Salt
Lemon zest or orange zest (optional)
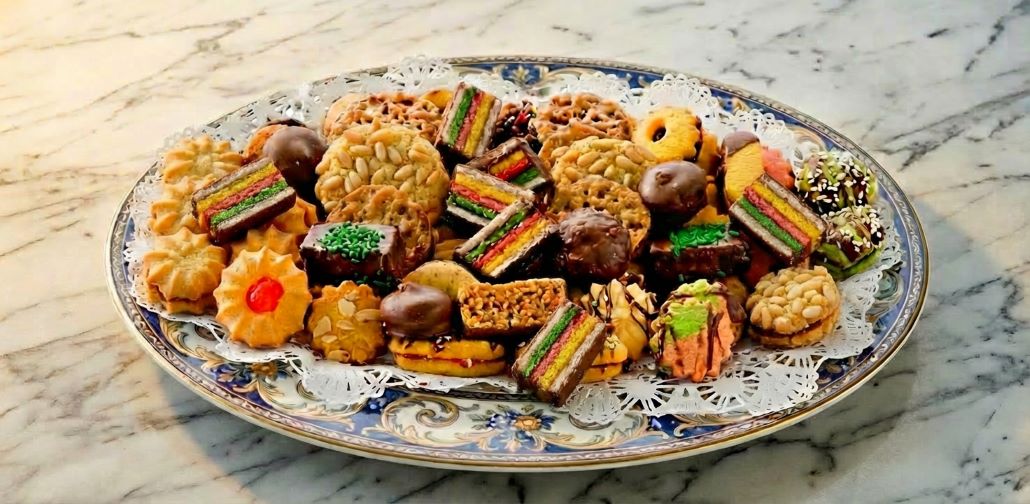
Traditional Decorations
Rainbow sprinkles
Maraschino cherries
Dark chocolate, chocolate chips
Jam centers
Chopped nuts
Powdered sugar dusting
These cookies are known for their rich, buttery flavor, tender crumb, and piped shapes, especially around holidays like Christmas and Easter. They’re super easy to make at home. No complicated steps, no fancy ingredients, just classic Italian goodness from your own kitchen.
Ingredients
Equipment
Instructions
- Preheat oven to 350° F. Line a baking sheet with parchment.
- In a medium mixing bowl, whisk together the flour, baking powder, and salt.
- In the bowl of a stand mixer with the paddle attachment, cream together the butter and sugar for 3 minutes until light and fluffy.
- Mix in the egg yolks and vanilla.
- While operating the mixer at a low speed, incorporate the flour mixture gradually until it is thoroughly combined. If necessary, incorporate the milk, adding ½ tablespoon at a time, until a dough with a soft consistency, yet not overly sticky, is achieved.
- Divide the dough in four portions. Place one portion in a plastic piping bag with a ½" large open star tip.
- Securely fasten the parchment paper to the baking sheet to ensure it stays in position during the piping process. When creating star-shaped cookies, hold the piping bag in a vertical position and position the tip approximately ½" above the baking pan. Apply even pressure while squeezing the bag until the cookie reaches a diameter of around 1 ½". Proceed to press additional cookies, ensuring they are spaced approximately 1"-2" apart to fill the cookie sheet adequately.
- If you plan to decorate the cookies solely with sprinkles, make sure to add the sprinkles prior to baking.
- Bake 10-12 minutes or until the edges of the cookies are light golden brown.
- Once the cookies are done baking, take them out of the oven and allow them to cool on the baking sheet for 5 minutes. Afterward, carefully transfer them to a wire rack to cool completely.
- For decorating the cookies with melted chocolate, follow these steps:Line a baking sheet with wax paper and ensure its large enough to accommodate the completely cooled cookies. Place the cookies on the lined baking sheet.Take a small microwaveable bowl and add the melting chocolate discs to it. Microwave the bowl at 50% power for 1 minute. Remove the bowl from the microwave and stir the chocolate. If the chocolate is not completely melted, return it to the microwave and heat it at 50% power for 15-second intervals until it is melted and smooth.Transfer the melted chocolate into a disposable piping bag or a plastic sandwich bag. If using a plastic sandwich bag, cut a tiny piece off one of the tips or corners.Begin decorating the cookies by piping a small circle of melted chocolate at the center of one cookie. Sprinkle nonpareils or desired toppings onto the chocolate. Repeat this process for all the cookies.Place the baking sheet with the decorated cookies in the refrigerator to allow the chocolate to firm up for approximately 5 minutes.
Notes
Tried this recipe?
Let us know how it was!Toppings

One of the best things about Italian butter cookies is just how versatile they are, making them perfect for endless customization. Their rich, buttery base pairs beautifully with a wide variety of toppings and finishes. Whether you’re baking for the holidays, a celebration, or simply treating yourself, these topping ideas will help transform classic cookies into something truly special and memorable.
Chocolate Dipped:
Melt semi-sweet, dark, or white chocolate and dip half of each cookie. Let them set on parchment paper. Add sprinkles before the chocolate hardens for extra flair.
Drizzle Instead of Dip:
Use a spoon or piping bag to drizzle melted chocolate over the cookies for a more delicate, modern finish.
Sprinkles or Nonpareils:
Classic and colorful! Gently press rainbow or chocolate sprinkles onto the cookies before baking or right after dipping in chocolate.
Cherry on Top:
Add a candied cherry (maraschino works great) to the center of each cookie before baking. This gives them a festive, bakery-style look.
Jam-Filled:
Sandwich two cookies with raspberry, apricot, or strawberry jam in between. Press gently and dust with powdered sugar for a classic touch.
Powdered Sugar Dusting:
Once cooled, give your cookies a light dusting of powdered sugar. Simple, elegant, and delicious.
Crushed Nuts or Coconut:
Roll the edges of chocolate-dipped cookies in finely chopped pistachios, almonds, or shredded coconut for extra crunch and flavor.
Storage
1. Room Temperature (Best for Short-Term):
Store your cooled cookies in an airtight container at room temperature. They’ll stay fresh for about 5 to 7 days. Keep them in a cool, dry place—away from direct sunlight or heat.
Tip: If you decorated them with jam or chocolate, place parchment or wax paper between layers to prevent sticking.
2. Freezing (Best for Long-Term):
You can freeze Italian butter cookies—either baked or unbaked!
Baked Cookies:
Let them cool completely, then store in a freezer-safe container or zip-top bag. Freeze for up to 2 months. Thaw at room temperature before serving.
Unbaked Dough:
Pipe the dough onto a baking sheet, freeze until solid, then transfer to a freezer bag. When ready to bake, no need to thaw—just add an extra 1–2 minutes to the baking time.
Avoid the Fridge:
Refrigeration can dry out these cookies and dull their flavor. Stick to room temperature or freezing for best results.